HAVE ANY QUESTIONS?
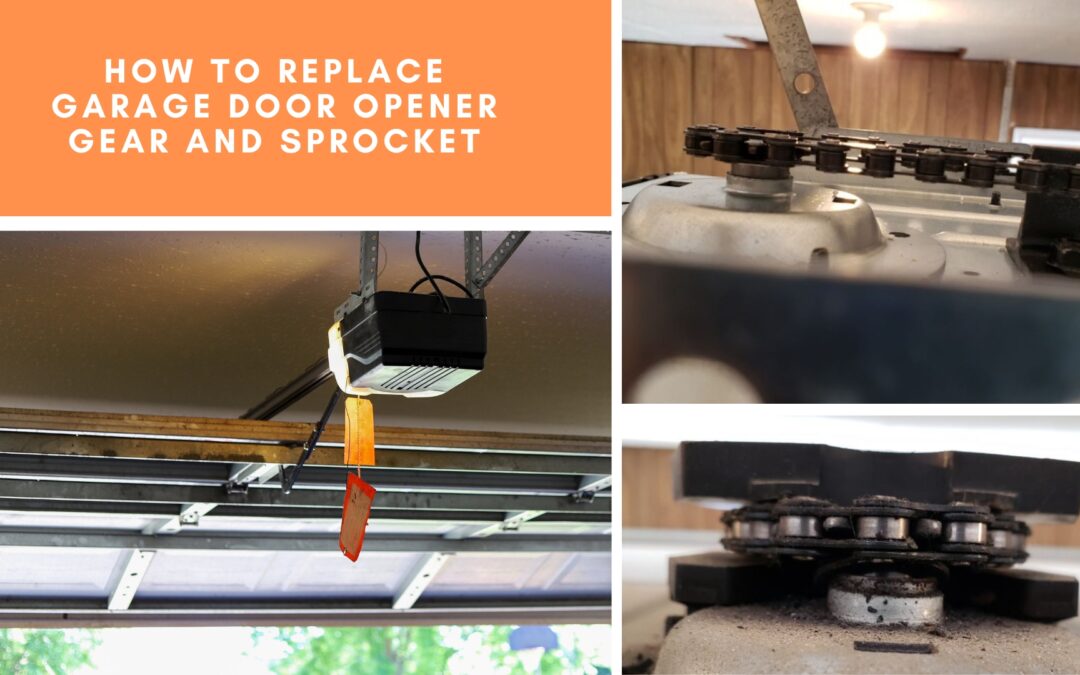
Have you ever heard a loud, grinding noise from your garage door while it was going up and down? This problem can happen when the opener’s gear and sprocket assembly wears out or breaks down, making opening and closing the door difficult and slow. Good thing that fixing the gear assembly is a quick and simple process that you can do on your own.
How to Replace Garage Door Opener Gear and Sprocket
Here is a helpful guide on how to do it quickly and easily.
Cut off the power source
Before beginning any work on your garage door opener, it is crucial to cut off the power supply. You can do this by releasing the emergency rope, which will cause the door to close manually. Then, you can remove the opener’s cover with the door closed.

Check the gear and sprocket assembly
It is important to inspect your garage door gears regularly. Look closely at the edges of the gears to see if they appear worn out. Sometimes, you may even see some shreds on the edges. These are all signs that it is time to replace the gears with new ones.
Gather your tools and newly purchased kit
When you need to change gears in a garage door opener, it is always better to have all the tools you need ready at once. This way, you can focus on the task and avoid going back and forth finding tools. Keeping each tool organized makes the process a lot faster. The tools you will need include:
- An Allen wrench
- A hammer
- A punch
- A screwdriver
- Nut drivers
You can buy new gear from a garage door dealer, or sometimes you can find a gear and sprocket replacement kit that includes everything you need (a set of gear, washers, grease) at a local store or online. The package also comes with an instruction manual.
Loosen the circuit board to make space
You must loosen the circuit board to replace your garage door opener gear. You can do this by loosening a few screws that hold it in place. Once the circuit board is loose, you will have more room to work with when replacing the gear.
Reduce tension on your garage door chain
The chain is attached to the rod, which creates tension as the gears operate. The next step is to lower the tension on the gears by loosening the chain with a wrench. Keep the chain in place with another wrench while you are working. Once you have loosened the chain, do not remove either wrench until you are finished changing the garage door gear.
Disassemble the gear and sprocket assembly
To take the sprocket and gear off, you will need to unscrew the bolts holding it in place. Once the sprocket is out, you can take the helical gear off the shaft. To do this, use a punch and hit the pin that keeps the gear in position. However, should this be too difficult, put some grease on the pin and let it sit for a few minutes. As for the worn gear, all you have to do is loosen the screws on the collar, and it will come off.
")
Install your new set of gears
To do this, first, remove the old worm gears from the shaft. Then, return the motor assembly. Next, place the new helical gears on the shaft, adding some grease to help them move smoothly. Again, tighten the chain and replace the cover on the opener. Finally, switch on the power source and test the new opener by opening and closing the garage door.
Garage Door Opener Repair Near Me
When it comes to garage door opener repair, turn to our garage door experts! Your safety matters to us at Titan Garage Doors NE, and that is why we help keep your garage door safe and secure no matter what. We will take care of everything garage doors. We can fix garage doors, replace garage door openers, or whatever kind of garage door repair needs you may have, whether big or small. On top of that, we will repair it at a time that fits your schedule. So call us today to schedule an appointment and get started.